What you’ll learn:
- How to effectively clean and dry printed circuit boards at the benchtop.
- Which PCB cleaning fluids and tools work the best?
Printed circuit boards (PCBs) have been around a long time. The PCBs we rely on to support the world of electronic devices slowly evolved from simple hand-assembled circuit boards to today’s high-density, miniature versions.
From the 1940s through the 1960s, almost all electronics were built from individual components, using labor-intensive assembly of thousands of separate diodes and transistors for military applications such as communications radios and artillery proximity fuses.
In the 1970s, the demand generated by the space race led to the first computer chips and “through-hole” PCB designs. The integrated circuits were embedded in the black plastic housings of the “chips” and the circuits were connected using long metal legs. During assembly, a technician would solder 16-20 legs into place, creating the hundreds of electrical connections that make the device “smart.”
The late 1980s saw the evolution to the first “surface mount” miniaturized components that used all four sides of the chips. This increased the number of electrical connections to 200 or more, making these PCBs extremely powerful. Plus, shorter legs with tighter stand-offs enabled more chips per-square inch on the board.
By the end of the 1990s, low standoff ball-grid-array (BGA) components were common. They eliminated space-wasting legs by having thousands of micron-sized points of solder underneath the chips to complete the circuits.
In the 2000s, fiber-optic components began to appear on PCBs as a way to convert optical signals to electrical pulses. 3D-printed components also started gaining popularity. They offer flexibility and versatility in PCB designs not possible before.
Ideal for quick PCB prototyping or producing custom circuit boards, 3D printing lets engineers create curved circuit boards and shapes other than flat surfaces. 3D-printed circuit boards typically consist of a mix of materials such as plastic, copper, and silver.
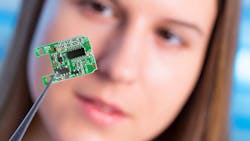
Today’s PCBs are chock full of micro components like BGA, wafer-level (WL), and quad flat no-lead (QFN) chip packages (Fig. 1). Low standoff components like MOSFETs and other zero-clearance components are now routine.
As PCBs progressed through the years, myths and misconceptions began to spring up regarding their handling and cleaning:
1. There’s no need to clean.
But as PCBs continue to shrink in size and grow in complexity, one major myth still pervades: Some fabricators believe cleaning PCBs during manufacturing isn’t necessary.
In fact, dirty PCBs are vulnerable to many long-term operation and reliability problems. Solder balls, fingerprints, and flux residue can create parasitic leaks leading to electrochemical migration, delamination, shorting, and dendrite growth—all of which potentially resulting in costly board failures and product recalls and returns. Thus, it’s important to remove the contamination to get the best PCB quality and performance.
2. No-clean always means no-clean.
In some instances, PCB fabricators switch from a water-based or rosin flux that requires cleaning to a no-clean flux when soldering boards. They mistakenly think this will eliminate the need for cleaning PCBs.
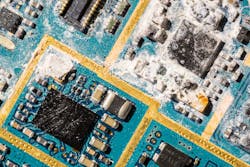
Instead, no-clean fluxes often present one of the most difficult PCB cleaning challenges. When salt activators in the no-clean flux come in contact with heat or other chemicals, they leave behind a stubborn and difficult to remove white residue (Fig. 2) that may corrode fragile circuits, create noise on the board, or interrupt signal transmission. Therefore, despite the name, many PCB fabricators must clean no-clean fluxes.
3. IPA works great.
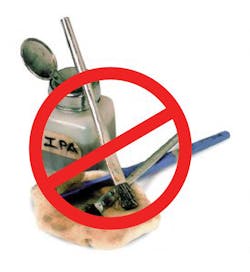
When faced with the need to clean, cost is an important consideration for PCB fabricators. Some typically select isopropyl alcohol (IPA) since it’s inexpensive and readily available. However, IPA typically isn’t the best choice for cleaning PCBs. It’s flammable and lacks the cleaning muscle to cut through and remove stubborn, lead-free and no-clean flux residues. It also isn’t good at removing greasy or oily fingerprints (Fig. 3).
Moreover, IPA is hygroscopic. That means it attracts moisture to itself, which dilutes IPA’s cleaning strength. IPA continues to absorb moisture until it simply no longer cleans well. And IPA pulls contaminants from the air and leaves them on PCB surfaces as it dries.
Better nonflammable cleaning fluids exist on the market for PCB cleaning. An HFC-, HFE-, or HFO-base is typically stronger than IPA. They can remove lead-free and no-clean residue quickly and efficiently with just one application, minimal soaking, and less scrubbing.
4. Stronger is always better.
In some instances, PCB fabricators choose the strongest flux remover they can find, thinking it will clean any PCB contaminant they encounter. However, the strongest cleaner isn’t always best.
A cleaner that’s too potent could damage delicate metals, soft plastic, and fragile coatings. Flux removers come in a variety of strengths, so fabricators should choose a cleaning fluid by carefully matching the fluid to the contaminant being removed. The cleaning fluid should be strong enough to effectively remove the flux residue, yet not cause damage.
5. Reject the rinse.
To save time, some PCB fabricators don’t thoroughly rinse their PCBs after cleaning. Any successful PCB cleaning requires four steps: wet, scrub, rinse, and dry. In the first step, a pure cleaning fluid loosens contaminants. Second, the circuit board is scrubbed with a brush to get rid of hard-to-remove particulates and oils. Third, contaminants are rinsed away with more cleaning fluid. Finally, the board is dried or wiped with a lint-free wipe.
Complete rinsing is essential to quality cleaning. If you can’t rinse, you can’t clean. It’s important to ensure that all flux residue washes off the board, otherwise it will redistribute back onto the board and dry in place. Unrinsed boards look poorly manufactured and often stay sticky with flux residue, even after cleaning.
6. Drying isn’t important.
Some PCB fabricators may skip the drying step, thinking that it’s unnecessary. But for a circuit board to perform reliably, it must be dry. Moisture left on the PCB can lead to dendrite growth, corrosion, electrochemical migration, or delamination (Fig. 4).
In addition, if the PCB is not properly dried, leftover moisture can outgas during the conformal coating application, resulting in pin-holes, fish eyes, and other coating defects.
7. Any wipe will work.
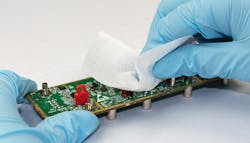
When benchtop cleaning, one of the most frequently used methods to dry PCBs are wipes. They may appear to be simple tools, but fundamental decisions must be made before using them on electronic assemblies.
All wipes are not the same. The wipes used for PCB cleaning should be made without glues or binders that leave residue behind. They also should be composed of a nonwoven lint-free material. Otherwise, lint and other debris might re-contaminate the PCB.
Furthermore, the wipes should be made of the right material for the best absorbency. For example, some wipes absorb cleaning fluids but not water. It’s essential to match the wipe’s absorbency to the contamination being removed.
8. Cheap dust removers work fine.
Dust removers are another effective drying method. They quickly and easily blow out trapped moisture from underneath larger components that a wipe may not reach. However, not all dusters are created equal.
Inexpensive canned air from an office supply store often leaves debris behind. In addition, many of these formulations are highly flammable. When selecting a duster for PCB drying applications, look at the safety credentials and find one that’s formulated with nonflammable gas.
9. Dispensing tools are a waste of money.
Many fabricators use old-style dip and brush cleaning to remove flux residue and other contaminants from PCBs. However, these methods often require multiple cleaning fluid applications, long soak times, and extra scrubbing to remove stubborn contaminants. On top of that, cleaning fluid inside the dip bottle typically gets dirty quickly and often transfers contaminants back onto the PCB.
Alternatively, a flux remover sprayed from a hermetically sealed aerosol can wets the PCB while keeping the fluid inside the can fresh and clean. But it doesn’t provide any scrubbing power. It also wastes cleaning fluid with its wide overspray.
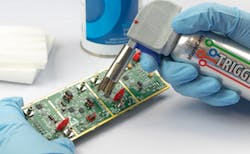
A better solution is to outfit the aerosol spray can with a quality dispenser. The flux remover flows through a dispenser hose from the aerosol can to a brush head. The tool provides good scrubbing followed by a complete rinse.
When used properly, controlled dispensers give technicians more control of how much cleaning fluid is dispensed, and where it goes (Fig. 5). The dispensers spray remover exactly where it’s needed without overspray, reducing wasted fluid. Technicians typically use up to 60% less cleaning fluid when using a controlled dispenser.
In addition, since the dispensing tools are closed systems, technicians don’t pour cleaning fluids from pails or drums. This reduces the risk of spills and fire hazards. It also limits worker exposure to fumes.
10. It costs too much to clean.
Some PCB fabricators think board cleaning is too expensive. Yes, effective PCB cleaning does cost time and money, but the alternative is more costly. Dirty PCBs can lead to board failures, product recalls and returns, rework, and scrapped boards. And, of course, these all hurt the bottom line, let alone give the PCB firm a poor image and a bad reputation. Experts say it’s worth taking the extra time to clean and dry PCBs thoroughly to ensure reliability and longevity.
11. Workstation cleanliness is overrated.
Some PCB fabricators do an excellent job of ensuring that their PCBs are clean and dry, only to have them re-contaminated by soiled tools and grimy workstations. If the workbench is dirty, it’s more difficult to keep the PCB pristine during cleaning.
A regular wipe down with a good quality pre-saturated, electrostatic-discharge cleaning wipe goes a long way in keeping tools and the benchtop free from dirt, dust, and other contaminants that can make their way onto the PCB, all without leaving lint, residue, or static charges behind.
Consult the Experts
PCB fabricators looking for help in determining the correct cleaning fluid or method should consult a cleaning firm that specializes in getting rid of flux residue. Some cleaning fluid manufacturers have field engineers who conduct on-site audits to evaluate cleaning methods. And some companies conduct comprehensive, in-lab cleaning tests with some of the industry’s most popular solder pastes and fluxes to ensure cleaning success.
About the Author
Elizabeth Norwood
Senior Chemist, MicroCare
Elizabeth Norwood is a senior chemist at MicroCare, LLC, which offers precision cleaning solutions. She has been in the industry more than 25 years and holds a BS in Chemistry from the University of St. Joseph. Elizabeth researches, develops, and tests cleaning-related products. She currently has one patent issued and two pending.
