There are way too many things coming across the transom these days, so I need to wrap up a bunch of short overviews into this article or they might get missed otherwise.
The first item is Electronic Design’s own Real-World Troubleshooting Tales of the crypt (Fig. 1). You might have seen it if you looked at our home page on Halloween, but the top article never lasts more than a day. So, give another gander at this missive: “From a misguided missile guidance system to a phantom bug in an emulator tool, engineers share how they worked good magic to troubleshoot and fix a problem.” You will need to sign in to pick up this PDF e-book, but it’s well worth the effort.
1. Electronic Design’s own “Real-World Troubleshooting Tales” of the crypt is a free ebook that covers everything from a misguided missile guidance system to a phantom bug in an emulator tool.
Make with Ada
Next up is the Make with Ada competition sponsored by AdaCore (Fig. 2). Developers can compete for over $8000 in total prizes by building cool embedded applications using the Ada and SPARK languages. I was a judge for last year’s Make with Ada competition and it was interesting reading their code. This year should be even more interesting due to the improved tools and frameworks. Some past winners are judges these days, and even Ada programming neophytes can do well.
2. AdaCore is having another round with its latest “Make with Ada” competition.
Regular readers will know that I am a proponent of Ada and SPARK because they can be used to write safe and secure programs better than most other embedded tools such as C and C++. The VDC Research paper about cost savings using Ada is an interesting read. Don’t be misled by myths about Ada.
Wi-Fi AVR-IoT Module
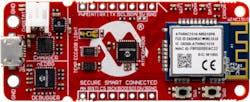
Microchip’s $29 AVR-IoT module showed up the other day (Fig. 3). It’s a Wi-Fi IoT node based on an 8-bit AVR ATmega4808 microcontroller and the ATWINC1510 Wi-Fi module. The micro uses Microchip’s Core Independent Peripherals (CIPs) that essentially allow developers to have the same API for peripherals across Microchip’s multiple microcontroller architectures.
3. Microchip’s AVR-IoT module includes an AVR microcontroller, Wi-Fi module, and a secure crypto element.
The tools provided by Microchip support C; however, I may eventually try it out with Ada or SPARK. In the meantime, the system can be up and running in under an hour using the USB interface to configure the system. Though you still need to provide power, after configuration it’s a W-iFi node. The USB interface looks like a disk drive with an HTML page that walks through the pairing process.
The module will connect to Google’s Cloud IoT Core platform. The module is tied to the cloud using the ATECC608A CryptoAuthentication secure element. It’s configured to handle authentication of each device and provides zero-touch provisioning. It can hold up to 16 keys or certificates and has its own AES-128, SHA-256, FIPS SP800-56A Elliptic Curve Diffie-Hellman and NIST standard P256 elliptic-curve support.
The Atmel START development tool is the next step. I haven’t had a chance to run through that yet, but I expect it to be on par with other IoT development steps since it requires more understanding of the APIs and frameworks involved. Still, the out-of-box experience is impressive.
Rapid IoT Prototyping Kit
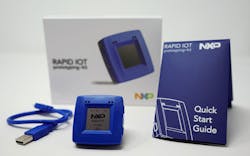
NXP’s Rapid IoT Prototyping Kit (Fig. 4) runs a little over $50, but provides a display, input devices, and a host of sensors. This module is based on the Kinetis K64 MCU with an Arm Cortex-M4 core. It has a KW41Z Wireless micro with Bluetooth Low Energy, Thread, and Zigbee wireless support. The NT3H2211 provides NFC Forum Type 2 Tag support, while the A1006 secure element provides secure authentication and anti-counterfeit support. Sensors include a gyroscope, accelerometer, magnetometer, barometer, temperature, air quality, and ambient light. The display supports capacitive touch input.
4. NXP’s Rapid IoT Prototyping Kit has a web-based, drag-and-drop IDE as well as the more conventional Eclipse-based MCUXpresso IDE.
This module works out of the box. You need to install an app on your phone to communicate with it, though, unless you just want to play with the standalone sensor apps on the system. There’s also a PC-based app that works via USB. The module works with the NXP IoT Modular Gateway platform and can plug into the optional Mikroelectronika docking station that lets you plug in Click boards. The web-based, drag-and-drop GUI Rapid IoT Studio and the Eclipse-based MCUXpresso IDE/SDK are for heavy-duty development. The former is easier to use but more limited in programmability. It can generate MCUXpresso projects that can then be tuned by a developer.
One thing I will mention about both IoT kits is the out-of-box experience is superior to what I saw a couple years ago. Furthermore, the development tools are more in tune with IoT frameworks and cloud services. They let developers get started quickly and reach the plateau where coding can commence. Security is also a part of the equation that was lacking. Both employ secure elements that are independent of the microcontroller, so these are worth exploring if you want to add a secure element to an existing design.
I know these items were all over the place, but hopefully one or more caught your fancy.
About the Author
William G. Wong
Senior Content Director - Electronic Design and Microwaves & RF
I am Editor of Electronic Design focusing on embedded, software, and systems. As Senior Content Director, I also manage Microwaves & RF and I work with a great team of editors to provide engineers, programmers, developers and technical managers with interesting and useful articles and videos on a regular basis. Check out our free newsletters to see the latest content.
You can send press releases for new products for possible coverage on the website. I am also interested in receiving contributed articles for publishing on our website. Use our template and send to me along with a signed release form.
Check out my blog, AltEmbedded on Electronic Design, as well as his latest articles on this site that are listed below.
You can visit my social media via these links:
- AltEmbedded on Electronic Design
- Bill Wong on Facebook
- @AltEmbedded on Twitter
- Bill Wong on LinkedIn
I earned a Bachelor of Electrical Engineering at the Georgia Institute of Technology and a Masters in Computer Science from Rutgers University. I still do a bit of programming using everything from C and C++ to Rust and Ada/SPARK. I do a bit of PHP programming for Drupal websites. I have posted a few Drupal modules.
I still get a hand on software and electronic hardware. Some of this can be found on our Kit Close-Up video series. You can also see me on many of our TechXchange Talk videos. I am interested in a range of projects from robotics to artificial intelligence.


