What you'll learn:
- What are the advantages of using the Solo 8Plus document camera?
- Setting up the document-camera system.
- The document camera's ability to work with any video-conferencing software.
One result of the COVID epidemic is that everyone from school children to the oldest adults are now familiar with video conferencing. Virtual technical conferences have been the norm, although a number of them are looking forward to in-person conferences once again. Even so, many have discovered the opportunities offered by virtual and hybrid conferences. Likewise, platforms such as YouTube have made video from all sources become second nature.
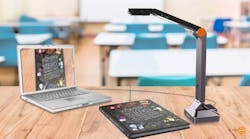
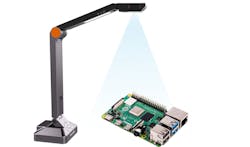
Webcams and smartphones simplify video conferencing, but there are instances where more specialized video-conferencing tools further facilitate video conferences and presentations. HoverCam’s Solo 8Plus is a 4K document camera and microphone (Fig. 1). It has movable arms that allow the camera to be positioned in many useful ways; for instance, to capture an open book or an object that you may be holding. It also can flip up to work as a webcam.
I originally wanted to do a video report on the Solo 8Plus. However, I’m writing an article instead, because you wind up not showing the document camera in any videos you’re recording. Like a conventional webcam, the device is taking a picture rather than being in it. I will be using the unit for some upcoming Kit Close-Up video series, but the focus will be on the kits and not the camera.
The 13-Mpixel camera is the centerpiece. It has a five-element, high-precision lens that delivers great pictures. I have a 4K screen that really shows off the quality, but it makes sense even when you’re using a lower resolution in a video conference due to the digital zoom support. These days, most video conferences run at 720p or maybe 1080p. Though it’s possible to stream 4K videos off of sites like YouTube, the lower resolution is what will be used for most presentations.
Getting Started
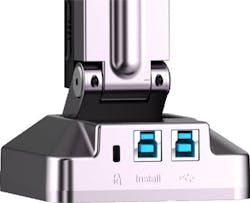
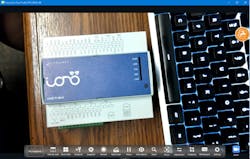
Setup on Windows is surprisingly easy since the initial software is contained on a flash drive built into the unit (Fig. 2). There are two USB connectors. One is for the software that’s normally used once, so there’s a removable cover for that connector. The other is a USB 3.0 connection for the camera that’s used after installation of the software. Of course, one of the first software operations is to update itself.
The HoverCam application is designed to augment the camera. It’s possible to use the camera alone with other applications like Zoom or Teams video-conference software. However, it typically will be employed with the HoverCam application, which provides annotation, editing, and recording features like slow-motion and time-lapse support.
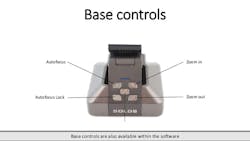
The camera itself has a set of controls on the base (Fig. 3). These buttons control different camera settings—one button locks and unlocks the autofocus, and another two buttons are for zooming in and out. The system is capable of 480x zoom, which is broken down into 6x ASR zoom, 8x interpolated digital zoom, and 10x mechanical zoom.
I did play around with the controls a good bit to become accustomed to them. Usually, you leave them alone, but sometimes they need to be tweaked. For example, autofocus must be adjusted if you’re moving an object closer or farther from the camera. Likewise, for zooming, you need to make sure what you want to show off fits within the frame. Focus also comes into play. It’s not really difficult, but getting used to the camera and controls makes any interaction much smoother with clearer results.
The unit folds up nicely in a way that protects the lights and camera. Opening it is quick and easy.
Working with the camera is simple, but it requires a bit of experimentation to become experienced with the functionality. For example, drawing on a pad or point to something in a book is trivial. However, taking apart an object so that it’s centered in the display takes some coordination. It becomes second nature, but practice makes perfect. It depends on whether you’re trying to make a professional-looking video or just showing off something quickly.
Using It with Video-Conferencing Software
The Solo 8Plus can be the main camera for any video-conferencing software. Manually flipping the camera up and down is one way to transition to viewing documents or objects. Depending on what you’re going to show, the orientation of the system, and your preferences, this may be the best way to use the document camera. It’s easy and doesn’t require the HoverCam app. The autofocus and zoom buttons work. The center button will flip the view 180 degrees, and a dial on the main camera section will rotate the image 90 degrees. The camera section also rotates around one axis.
The HoverCam Flex11 application provides an array of annotation, editing, and whiteboard features (Fig. 4). It can create PDFs, capture stills and video, and lots more. It has a management capability for handling artifacts that really helps in organizing things.
You may have noticed the Zoom button on the right of the screenshot. The application is integrated with Zoom to make it easier to enter or start a Zoom conference. That’s not to say that it doesn’t work well with other video-conferencing systems; rather, there may be a few more steps required to add the HoverCam Flex11 into the mix.
Essentially, the HoverCam Flex11 gets added to a video conference via screen sharing. I usually have the app maximized on one of my screens in a multimonitor setup.
I also would recommend using the Flex11 app with a touchscreen like a 2-in-1 laptop, which I own, or a specialty monitor like the Wacom Cintiq 16. These touch/pen-based systems provide much faster and better control. I’ve found the Wacom Cintiq to be very useful when working with image- and video-editing tools. Like the Solo 8Plus, being equipped with the right tools can make the difference between having an easy-to-use system or a frustrating taskmaster.
How you wind up using the system will depend on your requirements and preferences. I actually skip using the Zoom integration as my video-conference sessions tend to be more varied.
Wrapping Up
I do have some caveats. The unit does require a nice size workspace. My desktop with three monitors, telephones, keyboard, and mouse don’t leave much of a workspace for the Solo 8Plus, so I often use it on another table.
Good lighting is another detail that’s sometimes overlooked. The LEDs on the Solo 8Plus are handy and bright, but decent overhead lighting is key to a good user experience. A well-lit office usually works out fine.
Finally, video display space can be an issue. Working on a small laptop screen is possible. However, I find that a dual display (or more) makes switching between windows and apps unnecessary. It allows me to view what’s being shown to others and simultaneously see them and any other windows or videos.
Also keep in mind that the Solo 8Plus needn’t only be used in real-time when it comes to video conferencing and presentations. It actually excels at preparing video clips that will be presented later.
It’s possible to use a conventional webcam in place of the Solo 8Plus. However, the Solo 8Plus wins hands down when it comes to the results and convenience. Document cameras have found a niche in educational settings where viewing printed material or small objects is useful. It’s going to come in quite handy for our Kit Close-Up projects and other video conferences we have on tap. It also could prove useful for your next video meeting.
