This file type includes high-resolution graphics and schematics when applicable.
Dennis Turpitka, CEO, Apriorit Inc.
A driver is an essential software component of an operating system, allowing it to work with various devices, hardware, and virtual ones. Probably the most common perception about drivers is that they’re notoriously hard to deal with. Writing a simple device driver is difficult enough, and if you’re talking about something complex—well, let’s just say that not even major companies always get it right.
This area of software development is specific and detached, requiring its own techniques, processes, and specialists. Even specialized driver development services are offered on the software engineering market.
This article offers more or less a primer on how computer drivers are written, and hopefully will be your starting point in exploring the Windows NT kernel.
What is a Driver?
As mentioned, the most basic definition of a driver is software that allows the system to work with various devices. But this definition proves is rather incomplete—in reality, various types of drivers exist and they can be divided by two major criteria:
By tasks:
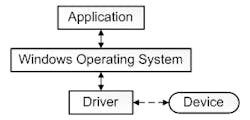
• Functional drivers: These are the classic drivers, which implement a standard device access interface (I/O requests) (Fig. 1). Such drivers are usually developed by device manufacturers, such as graphics-card vendors, audio-device vendors, etc.
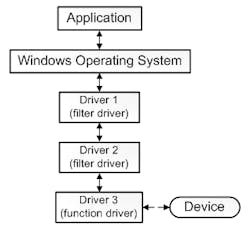
• Filter drivers: These drivers don’t address devices directly, but are involved in the processing of requests directed to those devices (Fig. 2). Usually, I/O requests from system to device are processed by a driver stack. Filter drivers can log, restrict access to the device, or modify the requests. For example, antiviruses (that use the file-system filter drivers) check files for viruses before allowing it to be opened.
2. Structure of a filter driver.
• Software drivers: These drivers, unlike previous ones, aren’t involved in requests to physical devices (Fig. 3). For example, to develop an application that finds hidden processes, you need to get access to objects of the system kernel, which describe every running process. Then you can split your application in two parts. One part will run in a user mode and provide a graphical interface, while the other one will run in a kernel mode and provide access to the closed-system data.
3. Structure of a software driver.
By execution context:
• Kernel-mode drivers: These drivers are executed in a system kernel and have access to the closed data. All of the above are applicable to them.
• User-mode drivers: Certain filter drivers and functional drivers, which don’t need access to the system data, can be executed in user mode. It makes them safer from a system stability standpoint.
Specifics of Driver Development
From the programmer point of view, a driver is a set of functions that process requests to a certain device or a group of devices. The programmer implements certain procedures depending on processed requests.
Elevated privileges in kernel mode impose additional responsibility on the developer, considering that any mistake in the driver code can result not just in the driver unloading, but also the overall system crash (remember the famous “blue screen of death” in Windows?).
Development language for Windows drivers is chosen based on the driver type:
• The Windows Driver Kit (WDK) compiler for the kernel-mode driver supports only C language.
• User-mode drivers are written in C++. Interaction with WDK happens via COM interfaces.
Tools
To run, debug and test the driver, you will need the following set of tools:
• WDK 8.1: Libraries, compilers, and samples for driver development. The WDK version is chosen depending on the targeted system.
• Microsoft Visual Studio 2013: The development environment.
• OSR Loader: A simple utility for installing, running, stopping and uninstalling the driver.
• WinDbg: A very simple and very convenient debugger that’s included in WDK.
• VMWare or VirtualBox: A virtual machine that’s needed to debug and test the driver.
• VirtualKD: A very useful utility that helps quickly and easily set up a virtual machine such as VMWare or VirtualBox for debug in kernel mode.
“Hello World”
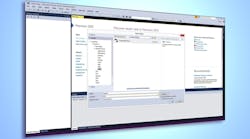
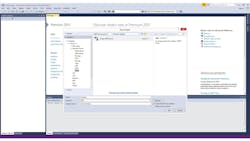
Now we will try to write a simple driver that displays a message in the kernel mode. First, create a new Empty WDM Driver project in Visual Studio (Fig. 4).
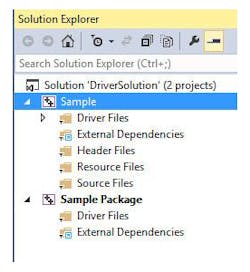
This is what we see in the Solution Explorer (Fig. 5):
5. Solution explorer section for an Empty WDM Driver.
Any driver needs to define at least one function: DriverEntry. This function will be used by the system when loading the driver. For our simple driver, it looks like this (Fig. 6):
As you can guess, this function says “Hello” to the whole world ;) Let’s try to build the project (Fig.7):
Perfect, now the driver is ready to be used.
All files are located here (Fig. 8):
8. Compiled driver files.
.cer: This is the certificate file—starting with Windows Vista, the OS doesn’t load unsigned drivers. In our case, we have a test signature, allowing only the file to be debugged.
.inf: This configuration file is for driver installation. We will not use it.
.pdb: This file contains information about the functions and variables necessary for debugging.
.sys: The driver itself.
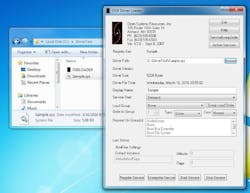
Let’s install the driver on a target system. To do this, we need to copy the Sample.sys file to the system, run OSLOADER.exe, and specify the path to the driver (Fig. 9).
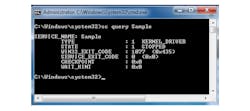
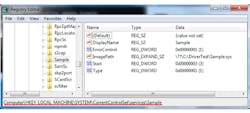
Run the installation by clicking «Register Service». Now we can see our driver in the command prompt (sc query) or in the registry (HKLM\SYSTEM\CurrentControlSet\Services) (Figs. 10 and 11).
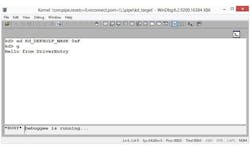
Before running the driver («Start Service»), allow the message display by executing the “ed Kd_DEFAULT_MASK 0xF” command in the debugger. Now, let’s start the driver (Fig. 12):
12. Executing the sample driver.
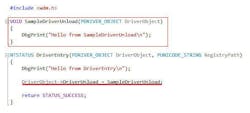
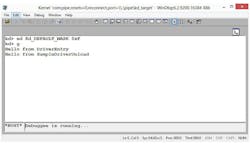
Congratulations with successfully running your driver! However, this driver can’t be unloaded from memory and will keep working until the OS is restarted. To unload the driver, we need to slightly modify its code (Fig. 13):
This will tell the system that our driver can be unloaded. In order to do that, SampleDriverUnload should be executed (Fig. 14).
To be able to receive requests, we need to register our device in the system. For this, we need to:
1. Define the SAMPLE_DEVICE_EXTENSION structure, in which we will store data required for work (Fig. 15).
2. Define the device name (Fig. 16).
3. Create DEVICE_OBJECT (Fig. 17).
4. Create a link to the device for applications (Fig. 18).
5. In SampleDriverUnload, delete both link and DEVICE_OBJECT (Fig. 19).
19. Making changes to the unload code in order to delete the device object and link for applications.
6. Register your request handling functions. For this, you need to fill out an array of pointers to MJ functions (Fig. 20):
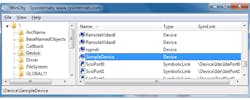
Currently, SampleMJDispatch just returns STATUS_SUCCESS. A simple utility from Sysinternals called WinObj allows us to see the result (Fig. 21):
and (Fig. 22):
Now let’s try to communicate with the driver. Let’s create a Win32 Console Application and execute the following code (Fig. 23):
23. Creating a simple test for the driver.
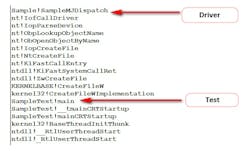
Put a breakpoint in the debugger on SampleMJDispatch and run the test. Below is a stack that shows how our request has reached the driver. In this case, the IRP_MJ_CREATE request was sent (Fig. 24):
By redefining certain functions from DriverObject->MajorFunction, we can write/read from the device and also execute specific requests.
A couple of words about error processing: Returning an error code from function is a common practice in the C language. The calling routine will check and process returned errors according to the code. To free resources in case of an error, a “goto” statement is used.
Microsoft includes a powerful tool for driver testing in Windows distributive called Driver Verifier (“verifier” command in Command Prompt). With it, you can detect deadlocks, memory leaks, improperly processed requests, etc. We strongly advise you to use it!
Conclusion
In this article, we covered only the very basics of software drivers and their development. “How are drivers for a computer written?” is a very broad and complex topic, as drivers are both hardware- and system-specific. Each device and each operating system presents its own set of challenges.
We encourage you to read further and experiment in a virtual environment. For Windows API, Microsoft Software Developer Network contains everything you want to know. And if you’re interested in Linux device driver development, you can find a good beginner-level tutorial here.
We encourage you to read further and experiment in a virtual environment. Good luck exploring the depths of driver creation!
