Building a gaming PC from scratch is relatively easy these days. Just start with a great case, a fast GPU, and go from there. Of course, using the top-end CPU, in this case Intel’s Core i7-6700K, is a requirement, since I planned on overclocking the CPU with a water-cooling support. The GPU is AMD’s Radeon R9 Nano that incorporates high bandwidth memory (HBM) on-chip. It can handle multiple 4K displays.
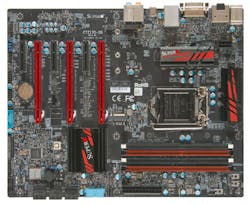
The Super Microcomputer’s (Supermicro) C7Z170-SQ motherboard (Fig. 1) is designed with overclocking support to handle the LGA1151 Core i7-6700K. The motherboard uses Intel’s Z170 chipset. It can handle up to 64 Gbytes of DDR4 memory provided by four Crucial Ballistix DDR4 DIMMs. The motherboard has SATA support, but a better option is to use Micron’s x4 PCI Express M.2 SSD that plugs onto the motherboard.
I did some testing of the final system and I will discuss it in more detail at the end but, in general, overclocking the CPU provides some benefit but not a major boost, especially compared to older, less costly alternatives. On the other hand, this CPU is much more power-efficient and it is the fastest around. The big power boosters were the GPU and the M.2 PCI Express SSD.
Building the PC
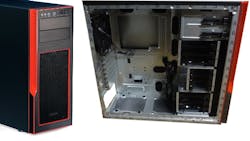
I used Supermicro’s S5 ATX mini-tower gaming case (Fig. 2). It was a bit of overkill for disk storage since I was using a motherboard-based SSD, but it had lots of room for the liquid cooling system. It can also support a number of additional cooling fans. Lots of fans means they can run slower, but provide sufficient air flow to keep the system cool. The case also looks good without being transparent.
The case has a number of nice features including magnetic dust-filter screen covers on the top and bottom of the unit. It also has tool-less disk-drive installation. The S5 can handle multiple GPU cards, but I used only one with this project.
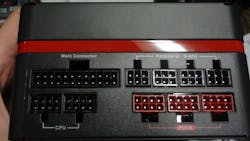
One place you do not want to skimp is the power supply. I used a modular Thermaltake ToughPower Grand 850W power supply (Fig. 3). It has sockets for plenty of power cables, but you only need to use as many cables as necessary, eliminating cable clutter. The power supply actually mounts on the bottom of the case, leaving the top available for the liquid-cooling radiator.
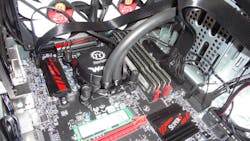
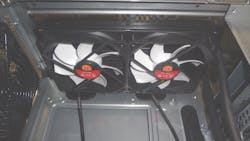
The next step is to install the Thermaltake Water 3.0 Extreme S radiator (Fig. 4). This 280-mm radiator has two fans. It looks like it is possible to fit a three-fan unit if there is nothing in the top disk slot. The radiator is right next to some heat sinks on the motherboard, so it could be difficult to replace a fan without removing the motherboard.
The water-cooling mount for the CPU needs to be installed before the motherboard is placed into the case. It is also easier to install the M.2 SSD now as well. The M.2 can be easily replaced once the motherboard is installed, as can the DDR4 DIMMs.
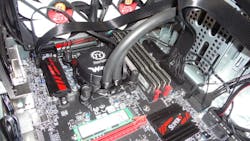
The pump and heat sink are installed after the motherboard is in the case and the processor chip has been installed. I used both the standard thermal pad and, later, thermal paste but more on that in the testing section. The resulting system (Fig. 5) is relatively open, so cooling the other items such as the memory is much better.
Once the cables were installed, it was possible to test the system since the processor has a GPU built-in. The system ran when turned it on, so I shut it down and installed the AMD Radeon R9 Nano. The system will take full-size cards as well as multiple cards, but I had the Nano and it is a great GPU.
There is an issue to consider with this motherboard if you plan on using multiple GPU cards. The system provides an x16 PCI Express interface if a single card is used. This provides optimum operation for the configuration I used. It flips to a pair of x8 interfaces if two cards are used. Keep in mind that main memory accesses run through the processor, which is limited to an x16 PCI Express interface. Higher-end gaming motherboards that operate two or more slots as x16 interfaces use a PCI Express switch with wider ports. This type of motherboard may or may not provide better throughput when multiple GPU cards are used, depending upon the demands on the switch.
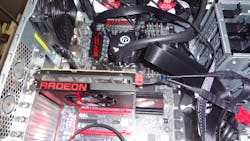
The Radeon R9 Nano does not take up a lot of space in the case (Fig. 6). On the other hand, it runs rings around the built-in GPU in the Core i7 chip. The GPU board can also support up to four displays.
It actually takes longer to write about putting the system together than actually doing it. There are no extra cables for a SATA drive, although the motherboard can handle six SATA drives. The motherboard also has a host of USB 2.0 and 3.0 sockets and headers along with a USB 3.1 Type-C connection on the backplate.
Crucial Ballistix DDR4 DIMMs held 16 Gbytes each. These were not the fastest Ballistix DIMMs, but they were the highest-capacity. I prefer to have more memory since I often run multiple virtual machines (VMs). The number of cores per VM needs to be limited since this is not a large, multicore Xeon, but I can easily allocate 8 or 16 Gbytes of memory to check out the latest IDE or application in isolation.
Testing the PC
Configuration was more interesting because of overclocking support. The system also supports secure boot, but that is another story. The challenge with overclocking is there are so many options that can be changed. This includes optimization of the interface and memory, although I have not really played with those.
The tools in the toolbox include Intel’s Extreme Tune Utility (XTU), Maxon’s Cinebench, and Futuremark’s PCMark and 3DMark. XTU is both a tweaking and benchmark program while the others are benchmark programs.
I am not going to list any results since they are very dependent upon the complete configuration that many would not replicate. I compared the test results with the hex-core Core i7 system I built about five years ago.
To start, the individual Core i7-6700K cores are faster than the older platform, but not by a major amount. This was to be expected since the older version was running about 3.3 GHz, whereas the newer starts at 4 GHz. Like many tests, it is not really an apples-to-apples comparison. Adjusting for the difference in base-clock rates shows the older chip almost, but not quite, on par with the newer one.
The bigger difference was the overclocking capabilities of the newer chip and motherboard. I was able to get the Core i7-6700K up to 4.7 GHz without any problems. Switching from the thermal pad to thermal paste dropped the average temperature by about 10° C. It allowed operation at 4.8 GHz most of the time, but some heavy compute chores pushed temperatures too high for me. I suspect more tweaking would help. It is actually rather time-consuming running tests multiple times and then running my own applications and games.
The difference in GPU performance on the two systems was significant. The AMD Radeon R9 Nano was two to three times that of AMD ATI boards. This was also expected. If you need to invest in upgrading or building a new machine, then put the money into the GPU. The payback will be higher.
There are water-cooled GPUs and it is possible to run multiple boards to get even more performance. There is significant cost though, so you need to decide how much performance you need.
I did a little testing on the Micron M.2 SSD. There was not really any competition even when using an SSD SATA drive on the new system. It is all about bandwidth. The x4 PCI Express link is the fastest available to the average user and it is worth using. There are M.2 SATA flash drives, but these will be on par with the SATA flash drives because of the bandwidth limitations of SATA.
Of course, you need to consider what your disk requirements will be. The SATA links can be used to drive up to six internal drives providing significantly more capacity available on an M.2 module. Still, it is possible to use all within a single system.
If the need for speed is with DRAM, then going with faster Crucial Ballistix DIMMs is the way to go. You can get 4 Gbyte DIMMs that run much faster than the 2400 MHz of the 16 Gbyte DIMMs. There will be (or may be already) faster 16 Gbyte DDR4 DIMMs available, in which case the trade-off will just be the higher cost.
Evaluating the PC
The final system met my expectations. It would be nice to run faster than 4.7 GHz, but it has been rock solid and very quiet. I doubt that 4.9 GHz would be very reliable, even with tweaking, and 4.8 GHz is only marginally faster. Overclocking delivers about 18% better performance.
The Micron M.2 x4 PCI Express module provides 256 Gybtes of very fast storage. There are PCI Express/M.2 adapters available and putting one, or a PCI Express flash card, in an older machine will definitely be worth the change.
Likewise, changing the GPU is the easiest way to really get a speed boost in an older machine. The latest Skylake CPU is still the best gaming platform, but there is a premium price for the overclocked version.
If I were planning on using two or three GPU cards, I would use another motherboard. There are some that support NVidia SLI and AMD Crossfire, two multiple GPU board standards. There are motherboards with multiple M.2 sockets if you need more of that type of storage. This makes it possible to have RAID configurations.
Looking for parts? Go to SourceESB.
About the Author
William Wong Blog
Senior Content Director
Bill's latest articles are listed on this author page, William G. Wong.
Bill Wong covers Digital, Embedded, Systems and Software topics at Electronic Design. He writes a number of columns, including Lab Bench and alt.embedded, plus Bill's Workbench hands-on column. Bill is a Georgia Tech alumni with a B.S in Electrical Engineering and a master's degree in computer science for Rutgers, The State University of New Jersey.
He has written a dozen books and was the first Director of PC Labs at PC Magazine. He has worked in the computer and publication industry for almost 40 years and has been with Electronic Design since 2000. He helps run the Mercer Science and Engineering Fair in Mercer County, NJ.
- Check out more articles by Bill Wong on Electronic Design
- Bill Wong on Facebook
- @AltEmbedded on Twitter
