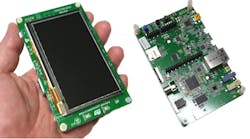
1. The STM32 F7 Discovery board includes a 4.3-in LCD touchscreen on top and an Arduino Uno V3 connector on the back.
Okay, I know I should have written up a hands-on review of ST Microelectronics’ STM32 F7 Discovery sooner (it has been out for a year, now), but things have been a bit busy around here. It did win a Best Product award at last year’s ARM TechCon, and with good reason: It is a slick platform with a solid microcontroller based on ARM’s Cortex-M7.
The Cortex-M7 is the top-of-the-line microcontroller platform from ARM. This year we might see some new chips based on ARM’s ARMv8-M architecture that adds TrustZone support, but the existing STM32 F7 chips will likely hold their own in terms of performance and power management.
STM32 F7 Discovery Platform
The STM32 F7 Discovery board (Fig. 1) is based on the STM32F746NGH6 with 1 Mbyte of flash memory and 340 Kbytes of RAM on-chip that delivers a CoreMark score over 1,000. The board adds 128 Mbits of Quad SPI (QSPI) flash and 128 Mbits of SDRAM. For design reasons, only 64 Mbits of the SDRAM are accessible. There is also a USB ST-LINK/V2-1 on-board for debugging support.
The most obvious feature of the system is the 4.3-in LCD touchscreen. This type of interface is more often found with higher end Cortex-A platforms but the STM32 F7 has the wherewithal to handle display as well as real time chores.
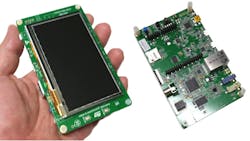
2. The STM32 F7 Discovery boards work out of the box. Just plug in a USB cable for power.
The flipside of the system reveals the wide range of interfaces including an Arduino Uno V3 connector that opens the possibility of using a wide range of Arduino shields. It has Ethernet support and wireless options can be added using more than one interface. Removable storage is available via USB ports or the MicroSD connector. There are audio and camera inputs along with 7.1 channel audio outputs including an SPDIF connector. About the only thing missing are gyro and accelerometer sensors that can be added with adapter boards.
The system is ripe for a handheld 3D-printed case.
Starting the STM32 F7 Discovery Platform
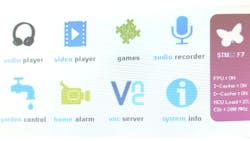
The platform comes pre-programmed with an impressive array of applications (Fig. 2). You can play games or even run a VNC server using the Ethernet connection. I found that to be interesting, but it does not really provide useful remote access. The audio player and recorder are functional, while the garden control and home alarm applications are more demos.
The first thing I noticed was how responsive the system is. This chip can easily handle the display and touch interface with a lot of headroom for real-time applications. There is a load indicator with the sample application.
Developing with the STM32 F7 Discovery Platform
One thing the STM32 F7 does not lack is software tools. It is supported by ARM’s mbed.org, and there are a host of commercial third-party tool vendors like Atollic, IAR Systems, Keil, AC6 Tools, Express Logic, HCC Embedded, and Segger. AC6 Tools, Keil, and IAR provide evaluation versions of their toolsets for the STM32 F7.
STmicroelectronics’ STM32Cube website houses embedded software libraries, middleware components, and HAL (hardware abstraction layers) for its line of Cortex-M solutions, including the STM32 F7 Discovery board. There is a STM32F746G discovery firmware download for getting started that drivers, the BSP, and CMSIS support, as well as project files, sample applications, and templates. These can be built using the evaluation software from Keil, IAR, and AC6.
The sample applications and evaluation software targets C and C++ developers, but the platform is not limited to those. MicroEJ provides Java support, while Adacore provides Ada support. STmicroelectronics also provides a complete set of schematics, bill-of-materials, and gerber files online.
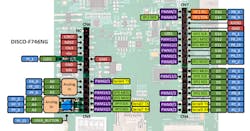
3. If you are using mbed tools for development, then adding the STM32 F7 Discovery board is a selection away.
I found IAR’s platform to be the easiest to get started with, at least for the sample applications provided with the system. It is also possible to use Eclipse and roll your own configuration, or buy Atollic’s Eclipse-based solution. The mbed approach looks to be easy as well, since a device configuration is already available (Fig. 3). The path you choose will be based on what you are using now for development tools or where you want to end up. It will probably not pay to try out two or three options unless you have not decided upon a preferred platform. I tend to run Eclipse, so that turned out to be an easy extension since I had Cortex-M4 support already configured. The main thing is to have ST-LINK/V2-1 support on whatever solution you choose.
I will hopefully get around to playing with the STM32 F7 Discovery board using Adacore’s GNAT development tool to do some more Ada programming. The Cortex-M7 is supported by Adacore, along with the other Cortex-M platforms.


